The code for this article is on GitHub: antlr-cpp
ANTLR can generate parsers in many languages: Java, C#, Python (2 and 3), JavaScript, Go, Swift, Dart, PHP and C++.
We have written an article to use an ANTLR C# parser and we have also written a mega tutorial to teach you how to use ANTLR with Java, C#, Python and JavaScript.
In this article we are going to see how to use ANTLR with C++.
We are going to build a grammar for a simple data format that allows to create an image with some shapes and text. So you can build images like the following one (actually, you should be able to build better images than this one).
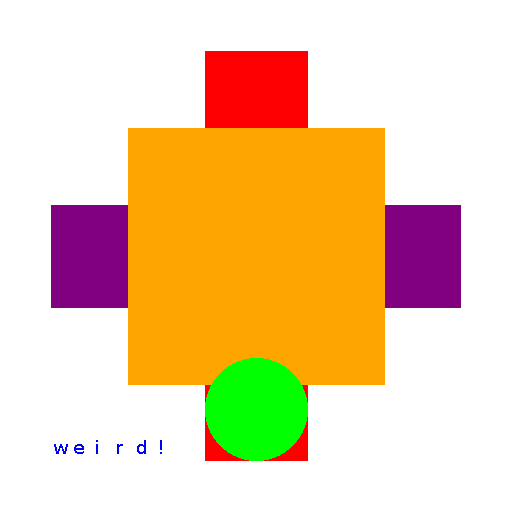
Do not worry: the image is unbelievably ugly, but ANTLR is great.
Setup
ANTLR is actually made up of two main parts:
- the tool, used to generate lexer and parser,
- and the runtime, needed to run them
The tool will be needed just by you, the developer, while the runtime will be included in the final software using your language.
The tool is always the same, no matter which language you are targeting: it is a Java program that you need on your development machine. There is instead a different runtime for every target language. The runtime must be available both to the developer and to the user.
The only requirement for the tool is that you have installed at least Java 11. To install the Java program you need to download the latest version from the official site, which at the moment is:
https://www.antlr.org/download/antlr-4.13.0-complete.jar
Instructions
- copy the downloaded tool where you usually put third-party java libraries (e.g.
/usr/local/liborC:/Program Files/Java/libs) - add the tool to your
CLASSPATH. Add it to your startup script (e.g..bash_profile) - (optional) add also aliases to your startup script to simplify the usage of ANTLR
As you can see, these are the typical instructions to install any program used for development. If you need more specific instructions you can look them up in the Setup section of the ANTLR Mega Tutorial.
At the end of the setup, you should be able to use the Java ANTLR tool to generate a C++ parser. using one of the following commands.
# if you created the antlr4 alias
antlr4 -Dlanguage=Cpp <name-of-grammar>
# if you didn't create the antlr4 alias
java -jar /usr/local/lib/antlr-4.13.0-complete.jar -Dlanguage=Cpp <name-of-grammar>
Pay attention to the case of the characters: the options in ANTLR are case-sensitive. So, if you type cpp or CPP for the language option you will get an error: you have to type Cpp.
If you are using a Linux distribution you could use the traditional package manager that comes with it to install ANTLR. Usually, the packages will have names like antlr4 or libantlr4-runtime(-dev). Remember that you will need to install both ANTLR and the ANTLR runtime for C++.
Visual Studio Code
If you use Visual Studio Code, you can install a wonderful extension: ANTLR4 grammar syntax support. The extension simplifies your life when using ANTLR. Among other things, it can automatically call the ANTLR tool to generate lexer and parser from your grammar each time you save it.
The code in the companion repository already includes the proper settings to do so. These settings are inside the file settings.json in the .vscode directory.
"antlr4.generation": {
    "mode": "external",
    "outputDir": "antlr4-runtime",
    "language": "Cpp",
    "listeners": false,
    "visitors": true
},
If you choose to use another IDE, you may have to generate the components by calling ANTLR yourself.
antlr4 -Dlanguage=Cpp -no-listener -visitor -o libs Scene.g4
The -no-listener and -visitor options stop the generation of the listener (active by default) and activate the generation of the visitor, respectively. Do not worry if you still do not know what a visitor is, we are going to see it later.
The -o option set the output directory. We output the generated code in the libs directory.
The CMake build script will also performs this step for you during the build of the project. However, it is useful to know how to do it manually in case you want to generate a parser in other languages.
CMake
The code of this project is cross-platform. To accomplish this goal we use CMake. This is a very popular tool to generate build files for many platforms and tools. So it can generate Visual Studio project files for Windows and makefiles for Linux. This means that you need to have it installed on your system. If you do not have it yet, you can download it from the official website or from your distribution repositories (if you use Linux).
CMake is quite popular, so we assume that you already know how to use it. If you do not, it is very easy to use: you just have to launch the command to generate the build files.
cmake
A bit like that. Precise instructions are in the README file in the companion repository of this article.
Building C++ projects on different platforms can be quite complicated, so the build script is based on the CMake script from the official ANTLR4 Cpp Runtime. This should deal with many typical issues. However, be warned that this will download the ANTLR C++ runtime from the official git repository and will build it. Therefore build time will be long for the first build.
The source code already includes the needed libraries for this project (CImg), so there should not be any problem building it. This is true provided that you have a normal desktop environment. For instance, the project may not work on WSL (Windows Subsystem for Linux) because WSL does not have a graphical environment.
We are using CMake because this simplifies handling the compilation for all the platforms of our readers. This is also the reason because you should use it, or alternative cross-platform systems, to distribute a professional application developed with ANTLR. However, if you are just trying it on something like your Linux computer, you could use the traditional method to create a C++ program that you are accustomed to. You will just have to add the ANTLR C++ runtime library to the dependencies of your program. For ease of use, you might also want to write a script to generate the parser whenever you change the grammar.
Format
Now that everything is set up and working, we can start looking at the grammar of our format.
The objective of our format is to allow non-sophisticated users to easily create images with shapes and text, simply by writing a description of the elements of the image.
Of course, the description is not written using free text, but in a format that closely resembles it.
The general structure of our format is the name of the scene (i.e., the image file) followed by a list of elements (i.e., actions to be performed by our program). Since this is a format to be used by average people, we take care of using simple ways to delimit actions: each action starts with a tab character and it is followed by a newline. An action can draw a shape or write a string of text.
Either of these two actions must specify a size of the element, a color and position. In addition to that, there are specific valid values for each command. To simplify the use of the format you cannot choose custom position (i.e., 100 pixels from the left), but only predefined positions (e.g., left). The same applies to the size of the elements.
And that is pretty much our format. Before seeing the grammar, let’s look at an example file.
composition:
    draw small square in red at center, top
    write medium "look at me!" in blue at left, bottom
Starting Rule: file
grammar Scene;

file        : (name NEWLINE (TAB elements+=action NEWLINE?)* ) EOF;
Our grammar starts with the name of the grammar, required in every ANTLR grammar, and our start rule: file.
The name of the grammar must be the same of the file containing it. In our case is Scene.g4 and the grammar is called Scene.
There is nothing special in a start rule, you do not have to put it first. However, by convention and for clarity, you want to put it at the beginning so that everybody that reads the grammar knows the first rule called by a program that uses the grammar. This facilitates following the structure of the grammar. In a simple grammar is not a necessity, but when you have to deal with grammars with hundreds of lines you will need it.
While the file rule is simple, there are a two interesting things going on:
- the subrule inside parentheses that starts with
TAB - the final
EOFtoken
Let’s see all of them more in depth.
Subrule
(TAB elements+=action NEWLINE?)*
This subrule describes the individual actions of our format: draw a shape or write a text. Each action must preceded by a TAB and can end with a newline. TAB and NEWLINE are tokens produced by lexer rules that we are going to see later. There can be 0 or an infinite amount of occurrences of this subrule.
The NEWLINE is optional for ease of use, because otherwise we would need also a newline right before the end of the file. So, generally users should include a newline, but there is an option not to. It is meant to be used only for the last action, but the way we formulated our rule the NEWLINE could be omitted everywhere.
This is not strictly a bug, but just a relaxed description. It does not change any behavior if an user input two actions on the same line, provided that the rest of the format is followed.
We could use a variation that strictly enforces the NEWLINE for all actions, but the last one.
(TAB elements+=action NEWLINE)* (TAB elements+=action)?
The first part matches all the normal actions, which are required to have a NEWLINE. The second part matches the optional last line format which does not have a NEWLINE. The last part itself is optional, so if the last line includes a NEWLINE the action is still matched by the first part.
However, this formulation would make the rule seem more complicated than it is.
The last thing to note about the subrule is that it uses a label: elements+=action.
The name of the label is elements, while += indicates that we want to add all instances of action parsed to one list.
It might seem superfluous using a label here since we only have action rules, so basically we are just renaming a list of actions in elements.
Well, actualy that would be a good reason on its own: it increases clarity in our code (i.e., we are a dealing with a list of elements instead of a thing called action). However, there is also the benefit that this way we can always reference elements in our C++ code. When you use a label the parser generate a corresponding method to access whatever the label is referring to. So, we could change what the elements label is pointing at and still keep using elements in our C++ code.
Why you would want to do that? For example we can change our data format to include options (e.g., the size of the whole image). In that case we would have to add a new rule which could be called action_or_option and use the label like this.
// from this
elements+=action
// to this
elements+=action_or_option
// we can still refer to "elements" in our C++ code
Final EOF Token
We do not define the EOF token anywhere in our grammar. It is predefined by ANTLR and it matches the end of the input. The interesting part is not that is predefined, but how we used it. Since we put at the end of our rule it means that the rule must match all the input, otherwise it will be a parsing error.
Usually, if you try to match a rule, the rule will match all the input that it can and then it will stop. If there are other parts of the rule that are not matched, the parser will simply ignore them for that rule. It will not throw an error, provided that all the input is recognized by the lexer. This is not a bug. As we said, there is no special format for a start rule. So, if the parser tried to match all the content for each parser rule this means that we could only have one giant parser rule. Because a parser rule should match everything.
This behavior is also useful in case you just want to really parse only parts of the input. For instance, this is useful if you are still building your grammar and thus you can only recognize parts of the input. It is also very useful if you are building a feature like autocomplete to use in an editor.
Imagine that your user is writing source code. Can you parse the whole input? No, because it is not complete yet. However, you can parse the line the user is writing and suggest options to the user. For example, if the user types the equals symbol (=), you can try to parse the part before the symbol to see if it is assignment. If it is, you can try to understand the type of the assignment and then, if it is a type with a fixed set of options you can provide them as suggestions, just parsing that little part.
However, there are times when you want to make sure to match all the input. In those cases you simply put the EOF token at the end of the start rule. Again, there is nothing special in the EOF token, by putting the EOF token you are simply saying that the rule must match the EOF token. Since this token is always at the end of the input, when you match it you have necessarily matched all the rest of the input, too.
Parsing Actions
name        : NAME ':';

action      : DRAW size shape IN color AT position
            | WRITE size STRING IN color AT position
            ;

size        : SMALL | MEDIUM | BIG ;
shape       : CIRCLE | SQUARE;
color       : BLACK | BLUE | BROWN | GREEN | RED | ORANGE | PURPLE | YELLOW | WHITE ;
position    : x=(LEFT | CENTER | RIGHT) ',' y=(TOP | CENTER | BOTTOM) ;
The actions themselves are simple: they are a series of fixed tokens mixed with a set of possible tokens, everything in a precise order. The fixed tokens are right in the rule action, while the set of possible tokens are inside other parser rule like size, shape, etc. For example if you are drawing a shape the keyword DRAW is required, while you can choose different values for size.
The format of the language is nice and simple:
- you can draw a figure or write a text
- the text requires a string containing the content of the text
- the figure requires a shape
- whether you draw or write you need to indicate the size, color and position of the element
Apart from STRING, all the elements have a fixed set of possible values. This is just a consequence of the fact that we want a simple data format for a non-sophisticated user.
That’s because a format like this is meant to be used to describe and generate a simple image. You would not want to fiddle with pixels and precise dimensions to create such images. This is not an image format to be used in an image editor.
The only change that we would make for a sophisticated user is adding option. Such user would want to have general options to set the whole size of the image or change the default values associated to SMALL or MEDIUM. It would want to have more control on the final result. Not even such user would want a more complicated format, because that would defeat the whole reason to use a data format for a similar tasks.
We use labels in the position rule (line 10), to capture the position on the horizontal and vertical axes. This is probably the most common use for labels. This way we just have to check the value of x or y, instead of checking for the presence of LEFT or TOP.
Lexer
This is the code of our lexer rules:
DRAW        : 'draw' ;
WRITE       : 'write' ;
IN          : 'in' ;
AT          : 'at';

CIRCLE      : 'circle' ;
SQUARE      : 'square' ;

SMALL       : 'small' ;
MEDIUM      : 'medium' ;
BIG         : 'big' ;

LEFT        : 'left' ;
RIGHT       : 'right' ;
CENTER      : 'center' ;
TOP         : 'top' ;
BOTTOM      : 'bottom' ;

STRING      : '"' .*? '"' ;

BLACK       : 'black' ;
BLUE        : 'blue' ;
BROWN       : 'brown' ;
GREEN       : 'green' ;
RED         : 'red' ;
ORANGE      : 'orange' ;
PURPLE      : 'purple' ;
YELLOW      : 'yellow' ;
WHITE       : 'white' ;

NAME        :  [a-zA-Z0-9\-_]+;

NEWLINE     : ('\r'? '\n' | '\r')+ ;
TAB         : ('\t' | '        ' | '    ' ) ;
WHITESPACE  : ' ' -> skip ;
The rest of the grammar contains the lexer. It is a bit long, but as simple as the rest of the grammar.
How the Lexer Behaves
You can see the lexer rules we referenced in the parser and one more which we did not: WHITESPACE. We want to discard a single space, so we use the lexer command skip to tell the lexer to match space characters but then throw them away instead of showing them to the parser (line 35).
The rule TAB matches both the tab character and either 8 or 4 consecutive spaces, but not an individual space alone.
It is important to note two things about the behavior of the lexer:
- it tries to match the largest part of the input
- it stops searching for matches whenever it can match a rule
This behavior can be problematic or helpful depending on your situation. You have to take it in account when designing your grammar. The most important consequence is that you have to pay attention to the order in which you define lexer rules.
In this example the order of the rules WHITESPACE and TAB is not significant. That is to say WHITESPACE does not hide TAB and viceversa, since they define two different tokens of different length. An individual space character does not hide 4 or 8 space characters, because 4 and 8 characters cover a longer part of the input than a single one. On the other hand 4 or 8 space characters are only one specific case and do not hide any other random number of space characters (like 1 or 2).
Things would be different if we changed the rule WHITESPACE to cover a series of space characters of any length, like the following.
WHITESPACE : ' '+ -> skip ;
Then we would make sure to put the rule TAB first. If we reversed the order of the rules the rule TAB will never see the spaces, because any number of space characters includes 4 or 8 of them.
Matching a String
The rule STRING (line 19) is the only rule that needs a bit of attention. It is obvious what it matches: everything between two double quotes. It is less obvious how it works. It uses non-greedy matching to alter the default way ANTLR matches things. As we said, by default the ANTLR lexer matches and assigns a token to the largest part of the input that it can. So, if we used simple matching, like in the following variant, STRING would match everything from the first double quotes to the end of the input.
// wrong
STRING      : '"' .* '"' ;
That is because the dot is a wildcard and matches every single character, while the asterisk make the match valid for any number of times. Instead, if we add the non-greedy modifier (i.e., ?), like in the original formulation, this behavior is changed and everything works correctly.
// correct
STRING      : '"' .*? '"' ;
Now the lexer would try to match everything up until it finds whatever is on the right, which in this case is a double quotes character.
So, the non-greedy match is naturally used a lot with things defined by delimiters, like strings.
How to Use ANTLR in C++
Now we can see how to use our generated parser in a C++ program.
#include <iostream>

#include "antlr4-runtime/antlr4-runtime.h"
#include "antlr4-runtime/SceneLexer.h"
#include "antlr4-runtime/SceneParser.h"
#include "ImageVisitor.h"

using namespace std;
using namespace antlr4;

int main(int argc, const char* argv[]) {
    std::ifstream stream;
    stream.open("input.scene");

    ANTLRInputStream input(stream);
    SceneLexer lexer(&input);
    CommonTokenStream tokens(&lexer);
    SceneParser parser(&tokens);

    SceneParser::FileContext* tree = parser.file();

    ImageVisitor visitor;
    Scene scene = std::any_cast<Scene>(visitor.visitFile(tree));
    scene.draw();

    return 0;
}
This is the main file of our program, that shows how to setup ANTLR for use in C++. The headers included in the first lines (3-5) are essentially the standard one you will always include. The first one is the one needed to use the runtime, the others two are for the generated lexer and parser. Obviously their name would change according to the name of the grammar, but the concept remains the same.
The lines 15-20 show the standard way to use an ANTLR parser:
- we take the input and convert to the ANTLR format
- we create a lexer that works on that input
- we produce a stream of tokens using the lexer
- we create a parser that works on the stream of tokens
The line 20 then uses a method of the parser, that corresponds to one of the rules of the grammar, to get the first node matched by the rule. In this case there is only one node file, because the way we defined our rule. However, in principle that could be many, each time you call the corresponding method you will get a new one.
This is all very clear, if you know the parsing terminology. If you do not, you have two options: you can get the short version or the complete version. The short version is that the lexer analyzes the input (i.e., the characters) and produces tokens, then the parser analyzes the tokens to produce a parse tree, a structure that contains the input organized in the logical structure defined by the grammar. If you instead want the long version, you can read it in our Guide to Parsing: Algorithms and Terminology.
The method SceneParser::file() returns a FileContext object, this a type defined by the generated parser, that contains method to access the text captured by the rule and its various elements. For example, our rule file contains a reference to the rule name, so the FileContext object will contain a method name() to access the part of file matched by name. If the component contains more than one element, like our label elements, the method will return a vector.
How to Use a Visitor
The lines 22-23 shows how to use a visitor to navigate the Abstract Syntax Tree generated by the parser. It is simple: you initialize it and call one of its methods. By default, a method has a name that matches a rule and accepts as argument the node of the corresponding Context type. You do not need to use such methods, you could create one yourself.
A standard visitor can be generated by ANTLR, if you specify the visitor option. The advantage of using a visitor is that you have a predefined way to visit the tree generated by the parsing. ANTLR also generates a default implementation of class (in our example is in SceneBaseVisitor.h). You may want to use this implementation because it already contains all the method that you have to define and has a sane default behavior.
class  SceneBaseVisitor : public SceneVisitor {
public:

virtual std::any visitFile(SceneParser::FileContext *ctx) override {
    return visitChildren(ctx);
}
As you can see, with the example of the visitFile method, this default behavior is returning the result of a visit to the children node. Essentially this accomplish a depth-first search of the three: all the children nodes are visited first until we reach the leaves of the tree. This default implementation has the benefit of allowing the user to override only the methods it need to customize. These methods will eventually be called by the rest of the visitor method during this depth-first search.
For instance, imagine that you want to customize only the visitName method, with this base implementation our visitName would be called by the default visitFile, via the visitChildren call.
You could also change this behavior: stop the depth-first search. All you have to do is simply not return a visitChildren or visit other nodes in any other way. In fact, nothing forbids you to change the name of a method and call it, for example, seeFile. Of course, if you do that, you will have to call this method yourself because the standard visitor does not know of its existence.
There is only one small thing to consider when using the default visitor: it returns a std::any object. In past version it returned an antlrcpp::Any, which was a simple structure, used to accept any type. Now it refers to the standard std::any object that fulfill the same purpose. So, it does not impose any practical burden, but it is something to remember.
Now, let’s see the visitor.
ImageVisitor
The visitor is the piece of our code that gathers the information from the parse tree and organize it in a way that is usable by the rest of our program. The visitor produces a Scene object with a name and a series of elements, representing the individual actions.
std::any ImageVisitor::visitFile(SceneParser::FileContext *ctx) {
    vector<Element> elements;

    for (auto element : ctx->elements) {
        Element el = std::any_cast<Element>(visitAction(element));

        elements.push_back(el);
    }

    std::any result = Scene(ctx->name()->NAME()->getText(), elements);

    return result;
}
This is the main method of our visitor, the one we will call from the main program, in all its power and simplicity.
You can see in the highlighted lines that accessing the node matched by parsing is quite simple: you just use the homonymous method (or the name of the label). Each homonymous method returns an object of the proper *Context type. So, name() returns an object of type NameContext and so on. Each *Context object also has default methods and fields to do things like getting the text matched by the node (getText()) or getting the parent (parent) of the node.
For example, on line 10 you can see that a FileContext object has a name node, accessed with name(); this method returns a NameContext object that has a NAME() method to get the corresponding token it contains. Tokens have no associated *Context object, they are all object of the type Token.
Once you understand how it works it is easy to deduce the structure of a *Context simply by looking at a grammar.
It might be obvious, but there is no harm in saying it: each node has its own *Context object. So, for instance each action has its own ActionContext object with its own values.
In our method, we first get all the actions defined in the file, accessing the method elements(), defined thanks to the label used in the grammar (line 4). Then, for each action we perform some operations to get all the data we need.
std::any ImageVisitor::visitAction(SceneParser::ActionContext *ctx) {
	Action action;

	if (ctx->DRAW()) {
		action = Draw;
		Shape shape = std::any_cast<Shape>(visitShape(ctx->shape()));

		return Element(action, ctx->size()->getText(), ctx->color()->getText(), ctx->position()->x->getText(), ctx->position()->y->getText(), shape);
	}
	else if (ctx->WRITE()) {
		action = Write;
		string text = ctx->STRING()->getText().substr(1, ctx->STRING()->getText().length() - 2);

		return Element(action, ctx->size()->getText(), ctx->color()->getText(), ctx->position()->x->getText(), ctx->position()->y->getText(), text);
	}
	else
		action = NoAction;

	return Element(action);
}

std::any ImageVisitor::visitShape(SceneParser::ShapeContext *ctx) {
	return Element::convertShape(ctx->getText());
}
These are the operation that we perform on each element, via the visitAction method:
- we look at each case and we convert the text of the input in the proper form for our program. In the case of the shape element it means that we visit the node shape (line 6) to create the corresponding enum value (line 23). To get the text of our string we have to remove the delimiting quotes (line 12). We also set a special do nothing action in case the input has a bad action (line 17).
- then we create a new element. We use two different constructors (lines 8, 14). We also use a special constructor to build an invalid action (in case there is an error in the input)
As you can see, a visitor allows to use a clear structure, that can easily be adapted to changes in a format or to the specific input you are considering in that moment. Given that is a data format with a simple format, the advantages of using a visitor are small, but it is a great pattern when parsing more complex structures.
Drawing Stuff
In the file Scene.h and most of Scene.cpp, we do very simple and obvious things like setting default values and defining methods to convert from the text input to the proper value. Like in this portion of the header file, in which we define the enums that we need.
enum Action { Draw, Write, NoAction };
enum Shape { Circle, Square, NoShape };
enum Scene_Size { Big, Medium, Small };
enum X_Position { Left, X_Center, Right };
enum Y_Position { Top, Y_Center, Bottom };
enum Color { Black, Blue, Brown, Green, Red, Orange, Purple, Yellow, White };
We have to define two different center values, to avoid confusion, but there is nothing complex here.
Shape Element::convertShape(string shape) {
    if(shape == "circle") return Circle;
    if(shape == "square") return Square;

    return NoShape;
}
The same can be said for most of the main Scene file. The method in this part can be understood even by first time users of C++.
These are all things that you can see for yourself looking at the complete files in the repository.
int Scene::getSize(int sizeImg, Scene_Size size) {
    switch(size)
    {
        case Big: return sizeImg * 80 / 100 ;
        case Medium: return sizeImg * 50 / 100 ;
        case Small: return sizeImg * 20 / 100 ;
    }
}

int Scene::getX(int sizeImg, Scene_Size size, X_Position x, int length) {
    switch(size)
    {
        // text in CImg is not handle perfectly, so we mess a bit with the sizes
        case Big:       return getPosition(sizeImg, (Scene::FONT_BIG * 0.82) * length, x);
        case Medium:    return getPosition(sizeImg, (Scene::FONT_MEDIUM * 0.82) * length, x);
        case Small:     return getPosition(sizeImg, (Scene::FONT_SMALL * 0.82) * length, x);
    }
}
Things get a bit more interesting when we see functions like getSize and getX. There we set the real meaning of the terms used in data format like the sizes small or medium. We define them in relation to the image size, for example small actually means 20% of the image.
In the other function we deal with an issue of the library that we use to draw the images: CImg. It is a good library, but in our testing the font it uses has some issues, so we mess with the real dimensions of the text, as seen by the rest of our program.
Basically, instead of calculating the correct length of the string drawn (the font is monospaced) we multiply the actual size of each character with 0.82. The result is that we say to the rest of the program that the text occupies less space than what it actually does. So that the text is generally more aligned with the shapes. The process is far from perfect, but it generally looks better this way. The size of the text, of course depends both on the size of the font and the length of the text.
int Scene::getPosition(int sizeImg, int sizeElement, X_Position x) {
    switch(x)
    {
        case Left: return sizeImg * 10 / 100 ;
        case X_Center: return (sizeImg - sizeElement) / 2 ;
        case Right: return (sizeImg * 90 / 100) - sizeElement ;
    }
}
The method getX is called to aid finding the correct position of the text on the horizontal axis. It calls the method that find the final position depending on the input of the user.
There are three cases:
- for left position, the start of the element is at 10% of the size of the image
- for center position, the center of the element is at the center of the image. Basically the element is centered
- for right position, the end of the element is at 90% of the size of the image. Basically the element is right-aligned.
The equivalent getPosition method for the vertical axis is fundamentally the same, only the name changes, so it is not shown here.
Let’s look at the main function of Scene: draw().
void Scene::draw() {
    CImg<unsigned char> image(512,512,1,3,255);

    for (auto element : _elements) {
        unsigned char* el_color = getColor(element.getColor());
        Action action = element.getAction();
        Shape shape = element.getShape();

        if(action == Write) {
            int x = getX(512, element.getSize(), element.getX(), element.getText().length());
            int y = getY(512, element.getSize(), element.getY());
	        CImgList<unsigned char> font = CImgList<unsigned char>::font(getSizeFont(element.getSize()), false);
	        // in CImg.h we have modified the last argument of this function
            // because the VS Compiler complained about va_args
	        image.draw_text(x, y, element.getText().c_str(), el_color, 0, 1, font);
        }
        else if(action == Draw) {
            int size = getSize(512, element.getSize());
            int x = getPosition(512, size, element.getX());
            int y = getPosition(512, size, element.getY());
            switch(shape) {
                case Square:
                    image.draw_rectangle(x, y, x + size, y + size, el_color, 1);
                    break;
                case Circle:
                    image.draw_circle(x + (size / 2), y + (size / 2), size / 2, el_color, 1);
                    break;
                default:
                    break;
            }
        }

        delete el_color;
    }

    CImgDisplay main_disp(image, _name.c_str());

    while (!main_disp.is_closed()) {
        main_disp.wait();
    }
    image.save_bmp(_name.append(".bmp").c_str());
};
Even this method is quite simple: all we do is drawing each individual element in sequence, then we display and save the whole image as a bitmap file.
The image (line 2) has a fixed size of 512x512x1 (the first three arguments), it is a normal RGB image with 3 channels (3) and it has a white background (255).
Notice that we use two different methods to get the top left corner of the shape or the text. That is not just because CImg has some issues with text, but because the length of the text is not fixed in relation to the size of the image. It varies depending on the length of the text itself. We have already seen the getX function, that it calls the getPosition function.
The name font (line 12) is a bit of a misnomer: you can only set the size (element.getSize()) and the variability (false, which means fixed-width) of the font. We cannot pick a custom font. Once we set the font, we just need to call a function to draw the text (line 15) The argument 0 and 1 set the background color (transparent) and the opacity of the text (full).
We apparently set different positions for each of our shapes (lines 23 and 26), but that is just because the functions work differently. To draw a square you need to indicate the top-left corner and the length of the side, instead to draw a circle you need to set the center and its radius.
Summary
That is all you need to know to start parsing with ANTLR in C++. We have seen how to design a data format grammar and a few of the main patterns used in writing a grammar. We have learned how to use a visitor and navigate the parsing tree produced by a parser. And we have put all together to good use in C++ program to generate simple images.
The resulting example image does not look great, but that is not the fault of the program. It is just the fault of our bad sense of style.
There are a few easy improvements that we could make to our grammar, like adding an option of of using a background image or drawing using an existing image instead of a shape (e.g., to use a logo for a watermark). But these are simple modifications when it comes to parsing, so they would not have added any value to this tutorial, but you can make these improvements yourself.
ANTLR makes parsing easy, even in C++.
Original written in April 2018 – Last revision and update in July 2023
The ANTLR Mega Tutorial as a PDF

Get the Mega Tutorial delivered to your email and read it when you want on the device you want